
The Gravity Engine asset provides scripts to add Newtonian gravity to your game. This can be done with the simple addition of several key components to your scene. Most games will require that you go further than this and interact with the Gravity Engine via scripting in order to e.g. maneuver spaceships. In order to do this effectively it is useful to have an overview of the concepts and have access to some well documented examples of common use-cases. That is the purpose of this “Getting Started” guide.
In some cases, we cannot contain our enthusiasm and have to point to features which are not strictly needed in our simple setup. These paragraphs are marked as ProTip: and can be skipped the first time through.
The goal of this page is to walk through a setup of a scene with the gravity engine, a sun and some planets and a spaceship that responds to user interaction.
Contents
Concepts
This section outlines the key concepts, and skips some details and special cases. We start with the most straight-forward usage.
The central class of the asset is GravityEngine. This singleton class handles all the gravitational physics in the scene. It runs the physics on a FixedUpdate() to ensure that uniform steps are taken in game time. It can learn about the objects in the scene that it needs to control in several ways:
- Auto-detect all objects in the scene that contain an NBody or GravitationalParticles component.
- Initialize based on a list provided in the inspector.
- Initialize objects dynamically via scripts calling GravityEngine.Instance().AddBody()
The evolution in the scene can be automatic (if Evolve At Start is set in the inspector) or it can be controlled by scripts via GravityEngine.Instance().SetEvolve().
Objects that are to be moved according to gravity attach an Nbody component. This component defines the initial velocity and mass of the object. The position is taken from the transform component (this is only the case when the GE units are DIMENSIONLESS, see “Scaling”).
The “hello world” of Gravity Engine
Let’s build the simplest possible scene with Gravity Engine: a planet with a moon.
Start with an empty scene.
- Add an empty game object to the scene and add the GravityEngine class as a component. Leave all the default values as-is.
- Add a 3D sphere to the scene. Set it’s position as (0,0,0). This will be our planet.
- Attach an NBody component to the sphere. Leave the velocity at 0 and set the mass to 100.
- Add a cube to the scene (our moon). Set:
- position = (5, 0, 0)
- mass = 1
This is the minimal setup required. You can now press play and watch the cube fall into (and through) the much heavier sphere.
In order for the cube to orbit the planet it needs some initial velocity in the direction of the orbit. Set the velocity in the NBody component of the cube to (0, 3, 0). Now press play and observe we have an elliptical orbit.
Notice that the sphere is also moving – since both objects orbit the center of mass. If the sphere is made more massive, then this will reduce the sphere’s “wobble” (but the velocity of the cube would need to be adjusted to get the same shaped orbit).
ProTip: Another way of “stopping the wobble” is to attach a FixedObject component to the sphere. The presence of this component tells GE to use the mass of this object to affect other objects but to move it according to the instructions in the FixedObject script, which tells it not to move. This script implements the IFixedOrbit interface which is a general mechanism to explicitly control the path of the objects. Fixed Kepler orbits make use of this interface.
ProTip: In this example we added the NBody directly to the game object holding the graphical component for simplicity. In general it is better to make an empty game object with the NBody and add the sphere as a child to this object. This allows the scale and orientation of the sphere to be adjusted using the usual transform changes. As we’ll see below, there are times when the transform of the NBody objects is under control of other elements.
Specifying an Orbit
In the “hello world” example, the velocity was picked to produce a simple orbit – but this may not have been the orbit that was desired. You could tune the orbit with trial and error, but then it would have to be re-done every time the masses in the scene were modified. This quickly becomes difficult to manage, so GE provides a class to ensure an object is placed in a specific orbit via the component OrbitUniversal. These specify an elliptic and hyperbolic orbit respectively.
To specify an elliptical orbit add an OrbitUniversal component to the Cube. The script will intially generate an error in the console until the CenterObject field is configured. Drag the Sphere game object reference into the CenterObject slot and voila:
The scene view shows the orbit that will result when the scene is played. The elements of the orbit can be adjusted to change the size, shape and orientation of the orbit. There are several options for specifying the shape of the orbit. Here we use the
- Size is controlled by the variable “p”,
- Shape is controlled by the eccentricity. 0 for a circle, with the orbit getting more oblong the closer the eccentricity gets to 1. A parabola has an eccentricity equal to one, greater than one defines a hyperbola.
- Orientation is defined by inclination, and two rotation angles. Play around with them to see how they act.
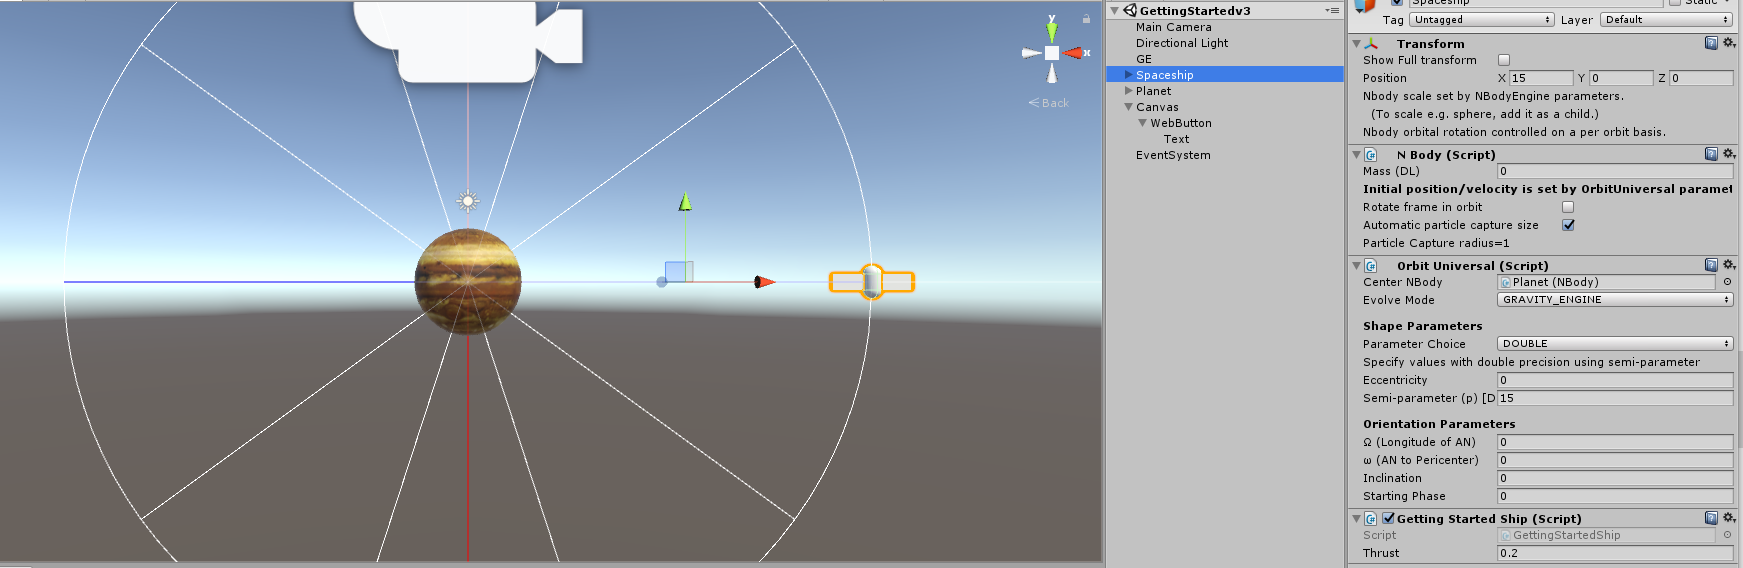
Now that there is an OrbitUniversal component attached to the Cube, notice that the transform component in the inspector has changed:
![]()
The comment in the transform component explains why: the position of the object is now controlled by the parameters of the OrbitUniversal component.
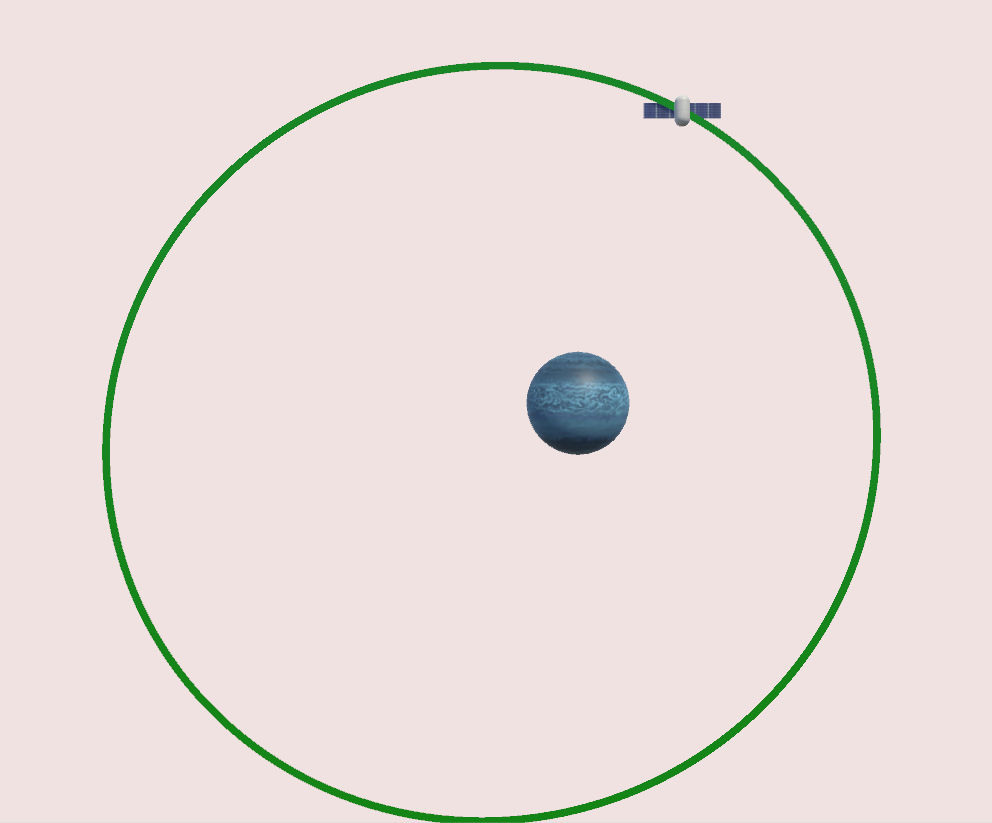
The resulting orbit is:
The orbit script computes the required velocity for the indicated orbit and computes the correct initial velocity to achieve this orbit. Once evolution has started the Nbody will move according to all the gravity effects in the scene. If there are only the two bodies specified in the OrbitUniversal then the desired orbit will result. If there are other masses in the scene then the orbit may be perturbed or disrupted by their effects. Adjusting the orbit parameters dynamically will not affect the orbit – since the OrbitUniversal script only sets the initial velocity.
If a fixed “on-rails” orbit is desired, then the OrbitUniversal can be used in a different mode, the Kepler mode. In this case the object is forced to move on the indicated orbit and will not be subject to the forces of other objects in the scene. In this case, dynamically updating orbit parameters will have an effect during evolution.
Seeing the Orbit In the Scene
In many games it is useful to see the orbits of objects when the scene is playing. Gravity Engine provides an OrbitPredictor component to accomplish this. Using an OrbitPredictor is very simple – create a game object in the scene and add an OrbitPredictor component. Then you just need to fill in the slots to indicate which object it should predict the orbit for and the object it is orbiting around.
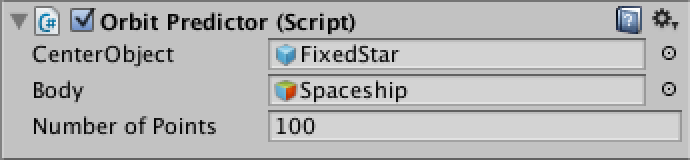
Adding an OrbitPredictor will automatically add a line renderer to the game object. This is used to create the path in the scene. A default material will be created and this can be modified or replaced with a material suitable for the game.
Controlling Orbital Speed
Now that we have the orbital shape and size under control with OrbitUniversal , how do we control the speed of the orbit? The speed that results in the scene is controlled by the shape of the orbit and the masses of the objects. Two things can make the orbit faster: (1) move closer to the center, (2) make the center object more massive.
Looking at the equation for the period of an orbit (time for one revolution):

If we want the size and shape of the orbit to stay the same, then the choices to make the orbit faster are:
- Increase the mass of the Sphere
- Change the mass scale attribute of the GravityEngine (under scaling). This will change the masses of all objects in the scene by a fixed amount when they are added to the GE.
How will a change in mass affect the speed? The laws of orbital mechanics provide the answer. The orbit period (time for one revolution) will be reduced by a factor of 2 when the mass is increased by 4. To double the speed we need to quadruple the mass.
GravityEngine provides a way to do this increase uniformly to all objects in the scene via the Mass Scale parameter under Scaling:
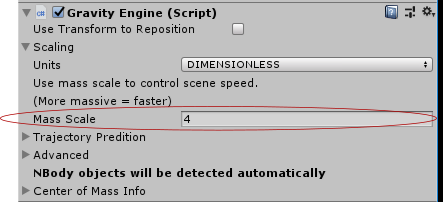
If we set this to 4, then the speed of our cube in orbit will double. Note that this correction is applied as the bodies are added to GE and changing it after that will not affect the objects currently managed by GE.
Adding a Spaceship
Lets add a user-controllable ship in the scene. The ship will move according to gravity and can change it’s course based on user input. This can be done with either continuous thrust or short impulses of thrust based on a user input.
A spaceship starts with a game object with an NBody component, so let’s add a new game object (say a capsule) and attach an NBody script to it. Set the mass to zero, because on the scale of planets and moons the spaceship mass is negligible for the purpose of gravitational forces.
The ship can now be positioned in the scene and given an initial velocity. (An initial velocity can be provided by an orbit script. The orbit script only sets the initial velocity, after that the ship is free to move in whatever path results from the forces and user input).
Set the ship position to (15,0, 0) and the velocity to (0, 3, 0). If you prefer you can add an OrbitUniversal to configure the initial spaceship velocity. Once the ship has started evolving the OrbitUniversal will not influence it any further (unless it is set to Kepler mode).
Now we need to create some code to change the ship velocity based on user input. The simplest possible case is a ship that thrusts based on pressing ‘W’.
public class GettingStartedShip : MonoBehaviour {
    public float thrust = 1.0f;
    private NBody ship;

   // Use this for initialization
   void Start () {
        ship = GetComponent<NBody>();
        if (ship == null) {
            Debug.LogError(gameObject.name + " does not have an Nbody component");
        }
   }

   // Update is called once per frame
   void Update () {
        if (Input.GetKeyUp(KeyCode.W)) {
            GravityEngine.Instance().ApplyImpulse(ship, thrust * Vector3.up);
        }
   }
}
The key line here is:
GravityEngine.Instance().ApplyImpulse(ship, thrust * Vector3.up);
The function ApplyImpulse() applies a fixed change in velocity to the NBody object specified by the Vector3 provided. Note that this is done by a call the GravityEngine class and not by changing the NBody velocity field directly. This is because the physics integrators in Gravity Engine needs to be updated directly. ApplyImpulse() is used because the gravitational mass of the ship is zero. If the object has mass, the the ApplyForce() API can be used.
If you are not doing a realistic simulation of known spacecraft you can choose some appropriate scale for ship velocity changes that “feels right” in your game. For those interested in realistic calculations of impulse for a known thrust and ship mass using GE with non-default units, I will create a more detailed explanation in a subsequent update.