Tutorials Changing Orbits: Ship In Orbit/Ship Transfer#
One of the key mechanics in a space game is changing to some new orbit or on a trajectory that carries it to some other orbiting object. GE2 has a number of ways in which this can be accomplished. To begin with, let’s consider changes to allow a ship in orbit to change to a different orbit. Some games make the details of the maneuver (direction and amount of thrust) a key part of the player interaction and others take a more “make it so” approach. GE2 supports both.
There is a tutorial video.
Ship In Orbit: Manual Orbit Changes#
A ship in orbit around a planet has a constantly changing velocity vector as the motion evolves around the planet. To change to a new orbit the ship needs to apply a force to produce a new velocity. This new velocity at the current position will result in a new orbit. It is very helpful to show the orbit that will result from such a change in velocity as part of the UI. This is typically done with the evolution of the orbit paused so the player can plan their maneuver. Let’s create a simple example of this to illustrate one way this can be constructed in GE2. We want the user to be able to:
pause the evolution of the ship (press P to pause, G to go)
on pause show a default course change: increasing the current velocity by 5% (it is useful to use relative amounts like this to avoid scaling issues with orbits of various sizes around bodies with different masses)
allow user input to change direction of thrust (A/D keys) and magnitude (W/S keys). To keep things simple we’ll limit direction changes to the orbital plane.
We’ll begin with the scene we created above with a ship in orbit around a planet. A new controller component that responds to user input and maps it into calls to GE2
will be required. Let’s call this ShipInOrbitController. It will be attached to the ship. The full script is in the same folder as the tutorial scene. Below we highlight
the key touch points of the controller code with GE2.
The first thing we want to do is to allow the player to pause evolution while the maneuver is planned. In response to the P key we will pause the controller via:
gsController.PausedSet(true);
after a suitable check for a keypress in the ShipInOrbitController Update() method.
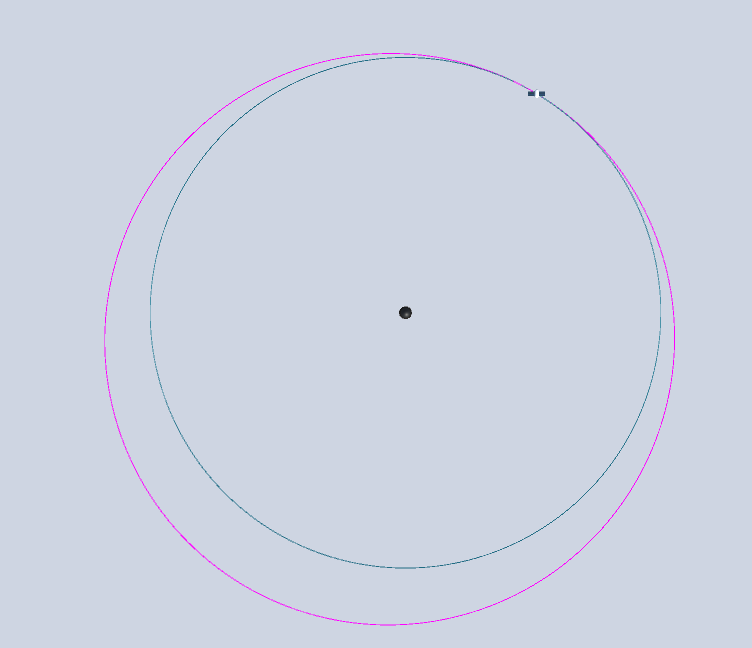
The user wants to be able to change the current velocity of the ship and see the new orbit and compare it to the current orbit. This requires that
we have an additional GSOrbitDisplay component in the scene which we will call orbitPreview. This will only be active when we are in the maneuvering state,
so it will be initially inactive and activated when P is pressed.
It is configured to be centered on the planet but not to track a specific GSDisplayBody, hence the “Track GSDisplayBody” is not set. Entering the paused state
the controller code needs to (see the script for the exact code details):
enable the
GSDisplayOrbitgame object that will show the new trajectoryadd the
GSDisplayOrbitobject to theGSDisplayfor the sceneretrieve the current state of the ship and add an initial dV
set the
orbitPreviewGSOrbitDisplaywith the modified v and the current position
This will ensure that the orbit preview object shows the new orbit that will result from the thrust specified.
The code for the velocity adjustment look like:
ge.StateById(bodyId, ref pausedState);
dV = thrustInitial * pausedState.v;
orbitPreview.RVRelativeSet(pausedState.r, pausedState.v + dV);
The pausedState is of type GEBodyState a struct used to encode state information retrieved from GECore. It is defined as
    public struct GEBodyState
    {
        public double3 r;
        public double3 v;
        public double t;
        ...
    }
with the position r, velocity v expressed as 3-vectors using the type double3 from the Unity mathematics package. The time of the state is held in t.
These values are expressed in the default world units set by the GSController inspector field. See the core code documentation for more details.
Scaling explains the choices of scales.
Enabling the new display orbit object is not quite enough. We also need to tell all display controllers that there is a new object to display. In our simple example we only have one, but in general it’s good form to add to the set held by the controller to future proof.
System.Collections.Generic.List<GSDisplay> displays = gsController.Displays();
foreach (GSDisplay disp in displays) {
    disp.DisplayObjectAdd(orbitPreview);
}
Code for the A/D/S/W are used to adjust the dV vector. SW modify the magnitude and AD rotate the vector about the Z axis. This highlights an important and somewhat subtle point. The orbit in GE and “physics space” is in the XY plane. Hence the orbit axis is Z. In the scene view the XZ orbit toggle is selected (as it usually will be) and in the scene view the orbit axis is the Y axis. Since the code is making a change to physics state of the ship, it must use the physics axis in its computation. For more on this see Right-Handed vs Left-Handed coordinates in RH versus LH.
For example for the key ‘A’:
dV = GravityMath.Rot1Z(dV, angleDeltaRad);
We take advantage of the GravityMath class to provide a z-axis rotation of a vector.
Once the user has tuned the orbit the g key is used to change the ship velocity and restart evolution. The code for this is:
// go: commit velocity change and unpause
gsController.PausedSet(false);
orbitPreview.gameObject.SetActive(false);
orbitPreview.enabled = false;
int bodyId = displayBody.gsBody.Id();
pausedState.v += dV;
ge.StateSetById(bodyId, pausedState);
This code un-pauses the engine, disables the orbit preview and then sets the state of the ship to the new velocity.
This example made an immediate change to the state of the ship when the evolution was paused. A more complex example scene that allows a sequence of manual
maneuvers to be created and illustrated is demonstrated in the ShipManualManeuvers example. This makes use of the GEManeuver class and the GE ManeuverAdd API.
TransferShip: “Make it so”#
In some space games the “move there” is more central than the fine details of “how to move”. There are cases when a player may simply wish to direct a ship to a specific
target orbit or to rendezvous with a target ship without hand-tuning the velocity changes required.
The TransferShip script supports this form of motion in scripting and GSTransferShip allows this component to be easily used in a scene.
First, lets cover a few basic orbital mechanics ideas associated with transfers. Hohmann and Lambert transfers are the most commonly used. This in part due to the fact that they can be computed directly assuming the maneuvers are instantaneous changes in velocity. (A more general continuous thrust transfer requires the mathematical equivalent of path finding: searching the space of solutions to find the steering law that achieves the desired end state.) Hohmann transfers make a further simplification by assuming the initial and final orbits are circular. (Of course in reality an orbit is never perfectly circular so TransferShip allows the threshold for “close enough” to be specified under advanced settings).
TransferShip has options for the target orbit of the ship via the Target Mode enum:
Target Mode |
Arg Type |
Description |
|---|---|---|
SHIP_TO_ORBIT |
|
transfer the ship to the target orbit specified |
TARGET_RDVS |
|
Rendezvous with the target GE body |
TARGET_INTERCEPT |
|
Move to same position as target body but do not match velocity |
SHIP_TO_POINT |
double3 |
Move to a specific point |
CIRCULARIZE |
None |
Make the current ship orbit circular |
When possible TransferShip will use a Hohmann transfer to reach the target. If one of the start or end orbits is not circular then a Lambert transfer will be used. A Lambert transfer
has an additional parameter that must be provided: an indication of how long the transfer should take. By default the Lambert transfer will make a choice that minimizes the
deltaV and this is the base time value. Again we avoid specific units in the simple case and use a multiplier to allow the user to specify “faster” (a value less than 1) or
“slower” (a value larger than 1). The nitty-gritty of Lambert transfers can be found in LINK.
Using GSTransferShip is straight forward (for details see GSTransferShip)
attach
GSTransferShipto a game objectfill in the ship, orbit center body and the GS controller
select the target mode: we’ll use SHIP_TO_ORBIT and set the target ship
GSDisplayOrbitas the targetfor the case of this demo select “Press T to Transfer”
Now we can run the scene and press T to initiate a transfer.
If we stop the scene and set the mode to TARGET_RDVS when we re-run and press T there will be no immediate change.
This is because TransferShip has determined that the ship needs to continue in it’s present orbit until the transfer will
result in the ship arriving at the target orbit when the target is in position. Note that if the orbits are in different
inclinations a transfer or rendezvous may require three maneuvers: a plane change, a size change and an arrival burn to match
the target.
If we change the target orbit to an ellipse a Hohmann transfer is no longer possible and the script will use a Lambert transfer.
In all cases TransferShip acts by calculating a series of maneuvers that will be required to achieved the indicated target.
These are computed and added to GECore. In some cases up to three maneuvers may be required to achieve the objective.
There is more to say on the topic of transfers (e.g. bi-elliptic). See Transfers.