Overview and “Hello Orbit”#
Gravity Engine 2 (GE2) provides an engine for modelling gravitational interactions and orbital mechanics. This includes:
N-body Newtonian gravitational interactions
orbit specification in a variety of input forms
orbital transfers (Hohmann and Lambert)
manual maneuvers and trajectory prediction
“on-rails” evolution using Kepler evolution of conics or Earth orbit propagators (SGP4/PKepler)
ability to “patch” conics together
solar system builder that retrieves orbit data from JPL Horizons for planets, moons, comets etc.
support for multiple independent gravitational systems (no singletons!)
The core engine and simulation components are C# classes that do not require pairing with Unity
game objects and can be used independently (e.g. search for optimal paths). GE2 also provides
a set of Gravity Scene (GS) prefixed objects that allow scenes with the engine, bodies and orbit
parameters to be easily assembled using the Unity Editor.
There are “quick tour” videos for the sample folders:
Asset Structure and Dependencies#
At the top level the asset consists of the following hierarchy (as suggested by Unity)
README: Text file containing information on release number and changes. Links to docs and support information.
Editor: Folder containing editor scripts for scene components
Runtime: The runtime code for GE2 (with an assembly definition file)
Samples: Sample scenes and the associated non-core scripts, resources and prefabs required to run them
All GE2 code is in the namespace GravityEngine2.
GE2 relies on several other packages:
Burst
Collections
Mathematics
TextMeshPro (for Samples only)
If you see errors when you first load GE2 it is likely because these packages are not installed. Use the package manager to add them.
Unity 6 projects will default to using the new Input system. The samples in GE2 use the old InputManager class. To avoid errors when running
the samples change the input back or enable both modes (see e.g. forum). The
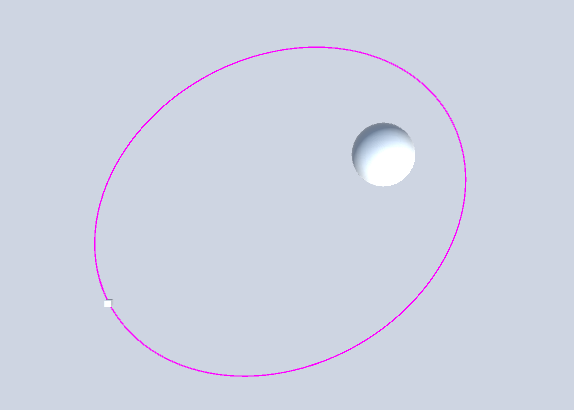
assets in Unity6 may appear pink. They assume the default renderer is in use.
The following two sections provide some examples that illustrate some of the key concepts and classes commonly used in GE2. The goal is to give the “big picture” of how GE2 is typically used. The later sections explore all the details.
“Hello Orbit”#
To make this more concrete, let’s begin with a motivating example to show one way to setup a scene with a ship in orbit around a planet. We’ll gloss over many of the fine details in this first pass.
The video shows the details. In outline the key points are:
add a
GSControlleradd a child with a
GSDisplayadd a child game object Planet
add a GSBody and mark initial data/input format as FIXED, set the mass to 1000
add a GSDisplayBody
add a Sphere as a child
add a child game object Ship (as a child of Planet)
add a GSBody and mark initial data/input format as COE, set to a=20, mass=0 (COE = classical orbital elements)
add a GSDisplayBody
add a GSDisplayOrbit
set the center display body to planet
create a line renderer and fill in the reference
add a cube as a child
go back to
GSControllerand click auto-scaleadd the Prefab
GE2Cameraand configure
Press play and you can see the orbit. If you stop the scene you can alter the eccentricity and size of the orbit in the GSBody inspector. You will see the resulting change in the scene view as a gizmo when the orbiting body is selected and it will appear when playing.
How is that Working?#
In this section we outline in general terms the roles played by the components used in the scene to provide some insight into the “moving parts”. A full description of the components can be found in the sections below.
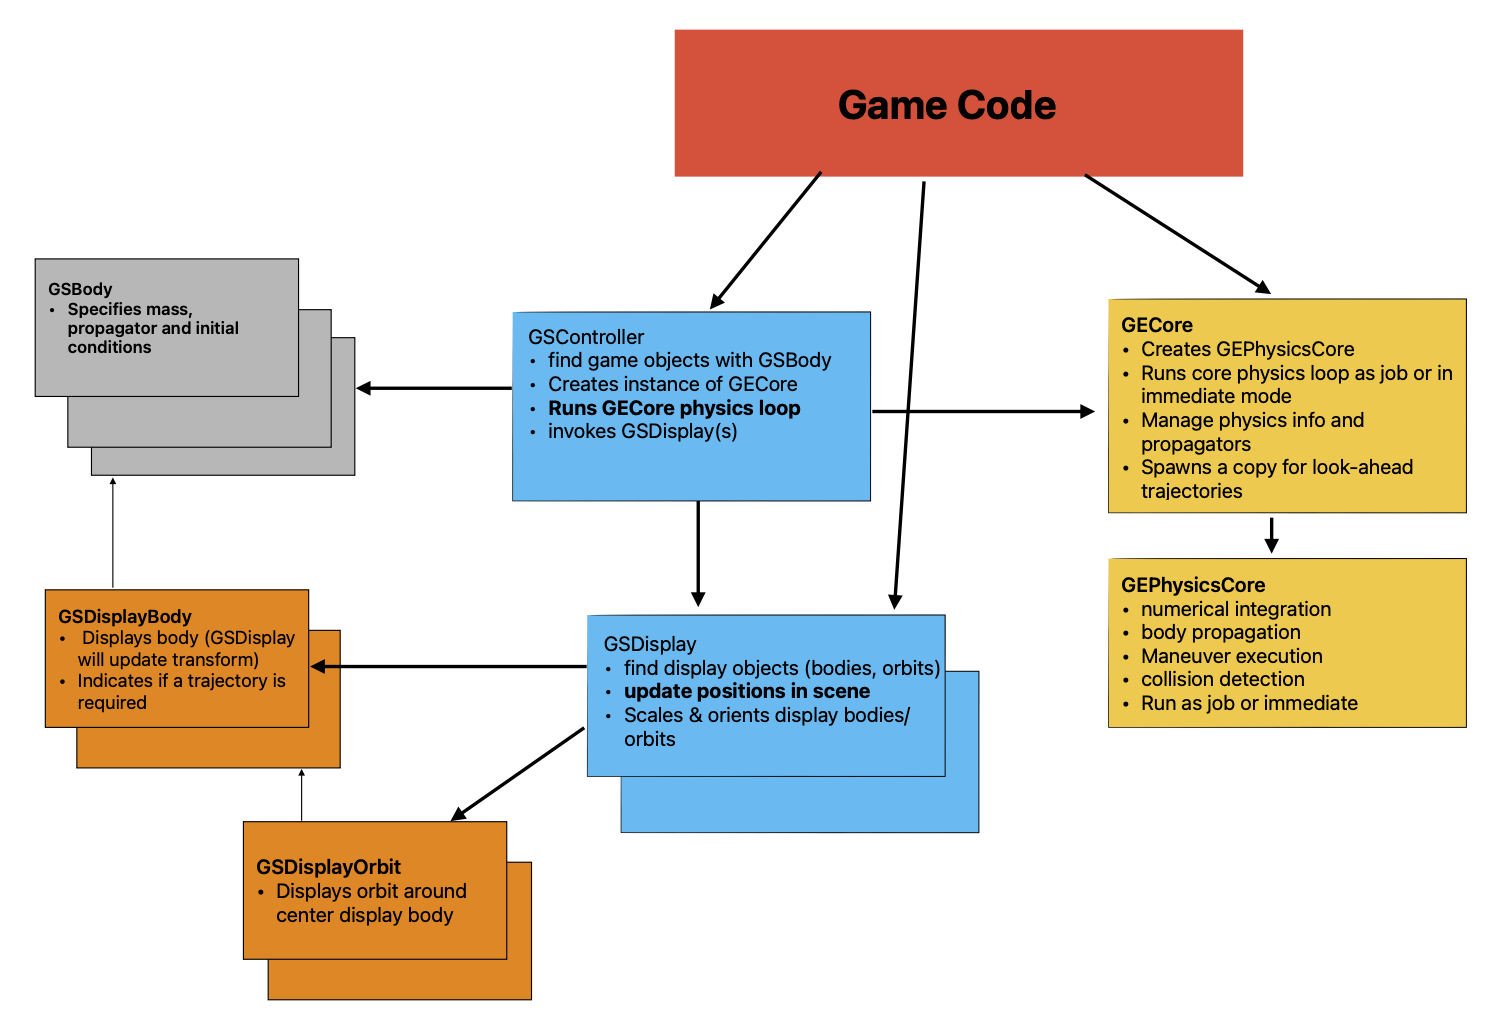
GSController: This component manages the tasks of:
finding the bodies to evolve (
GSBodycomponents)creating a
GECoreinstance to evolve themevolving these bodies on
Update()at a speed that matches the desired time scaleusing one or more
GSDisplaycomponents to display the updated positions, orbits etc.
For each evolving gravitational system there is an internal GECore (GE) class. This is a stand-alone (non-Unity component)
to allow flexibility in its use. The GSController class creates a GECore instance and configures it according to information provided in
the inspector. This sets the units to be used in the world scale and indicates the desired game time for the typical orbit specified in the
GSController inspector. By default the controller will look for GSBody elements attached to the hierarchy below this game object and add these
elements to the gravitational simulation.
During the Update cycle the controller will evolve the bodies forward at a rate that matches the requested orbit period. A toggle for ‘Debug Keys’
allows the numeric keys 1-9 to be used to speed up the evolution.
By itself this evolution of the bodies will not show up in the game scene (i.e. their transform positions will not change). For that we will need a:
GSDisplay: This component coordinates the displaying of objects in the scene as they evolve due to the gravity forces (or selected propagators).
Not all bodies in the scene need to be displayed. The simplest way to ensure a body is displayed is to add a GSDisplayBody component to the same game
object that has a GSBody attached. The GSDisplay component looks in the hierarchy below for GSDisplayBody and GSDisplayOrbit instances and takes responsibility
for displaying them using the visual scale provided in the GSDisplay inspector.
The display of the objects will be relative to the transform position of the GSDisplay and its transform Rotation will act as expected. Note the transform Scale will not. The display scale is
set by the value in the GSDisplay inspector scale parameter.
The display component also usually has XZ orbits selected. In physics space a “flat” (inclination zero) orbit would be in the XY plane but in Unity’s left handed coordinate system it is preferable to orient this in the XZ plane. See RHvsLH for an in-depth discussion.
As described in detail later, there can be more than one display instance for a controller to allow e.g. a mini-map with a simplified view of a subset of the objects.
GSBody: An entity to be evolved in GE2 is described by GSBody. This component does a LOT of heavy lifting in GE2 since there are many possible schemes
for describing initial conditions and evolving a gravitational body. It specifies the initial conditions with options for:
absolute position and velocity (r, v)
position/velocity relative to another body
an orbit around another body
It also describes how the body should be evolved ranging from N-body evolution to various orbit propagators (Kepler, PKepler, SGP4) or from an ephemeris table.
GSDisplayBody:
This component tags a game object as representing a specific GSBody in a GSDisplay. If the game object with a display body also has a GSBody component attached then it will by default represent that body.
Alternately, this can be explicitly provided in the inspector. GSDisplay will set the transform position of this object (under the direction of GSController) as part of the
LateUpdate() cycle.
GSDisplayOrbit: An orbit can be illustrated with this component. This can be the up-to-date orbit of an evolving GSBody or it can be a stand-alone orbit specified
via initial data in the inspector for this component (e.g. to illustrate the target orbit desired in a scene). This is called every frame by GSDisplay with updated
values for the body.
The details for these scene components are found below.